Pycharm配置jupyter notebook 远程运行 2022-04-05 机器学习 暂无评论 298 次阅读 ### 1. 远程服务器Jupyter Notebook配置 默认安装好了conda **(1)、给需要的conda环境安装jupyter** ```shell conda activate xxx # xxx用你要使用的环境名字 ``` **(2)、安装jupyter** ```shell conda install jupyter ``` **(3)、生成jupyter配置文件jupyter_notebook_config.py** ```shell jupyter notebook --generate-config ``` (生成的配置文件的位置在:/home/xxx/.jupyter/jupyter_notebook_config.py xxx是你的用户名) **(4)、生成密码** ```shell jupyter notebook password ``` 敲完上述命令会显示的输出: ```shell Enter password: xxxx Verify password: xxxx [NotebookPasswordApp] Wrote hashed password to /home/xxx/.jupyter/jupyter_notebook_config.json ``` .json文件里保存了生成的hash密码。 **(5)、修改配置文件** 打开配置文件: ```shell vim /home/xxx/.jupyter/jupyter_notebook_config.py ``` vim打开(config文件打开里面应该全是注释),添加以下内容: ```shell # ip 设置为 * c.NotebookApp.ip = '*' # hash密码,前面的u不可以省略,后面的hash密码就是在.json文件中双引号里的内容 c.NotebookApp.password = u'<your hashed password here>' # 浏览器设置不打开 c.NotebookApp.open_browser = False # 设置一个固定端口,设置一个没有占用就好 c.NotebookApp.port = 8888 # 这个可加可不加,似乎不加也没什么问题 c.NotebookApp.allow_remote_access = True ``` **(6)运行jupyter notebook** ```shell conda activate xxx jupyter notebook ``` 此时,在浏览器输入**`http://ip:port/?token=xxx` (xxx是你的明文密码,不是hash密码)**就可以使用了 ### 2、在pycharm中使用远程的Jupyter Notebook **(1)在server上启动jupyter,具体参考上一步** **(2)新建一个jupyter notebook文件** 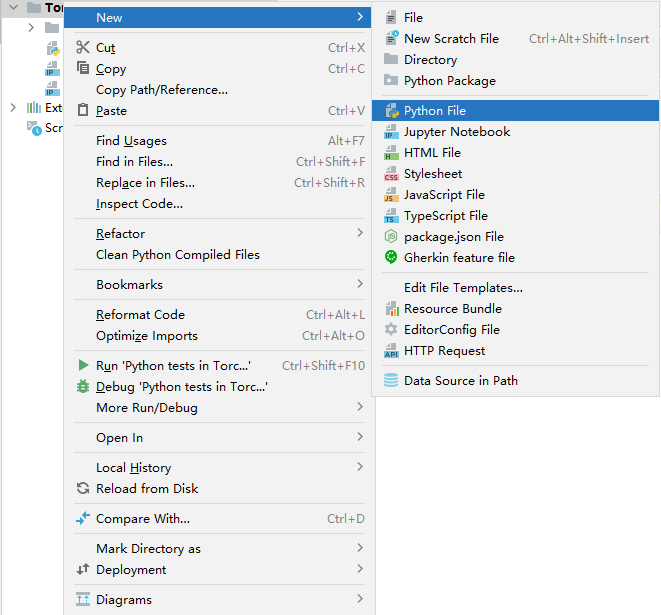 **(3)配置jupyter server** 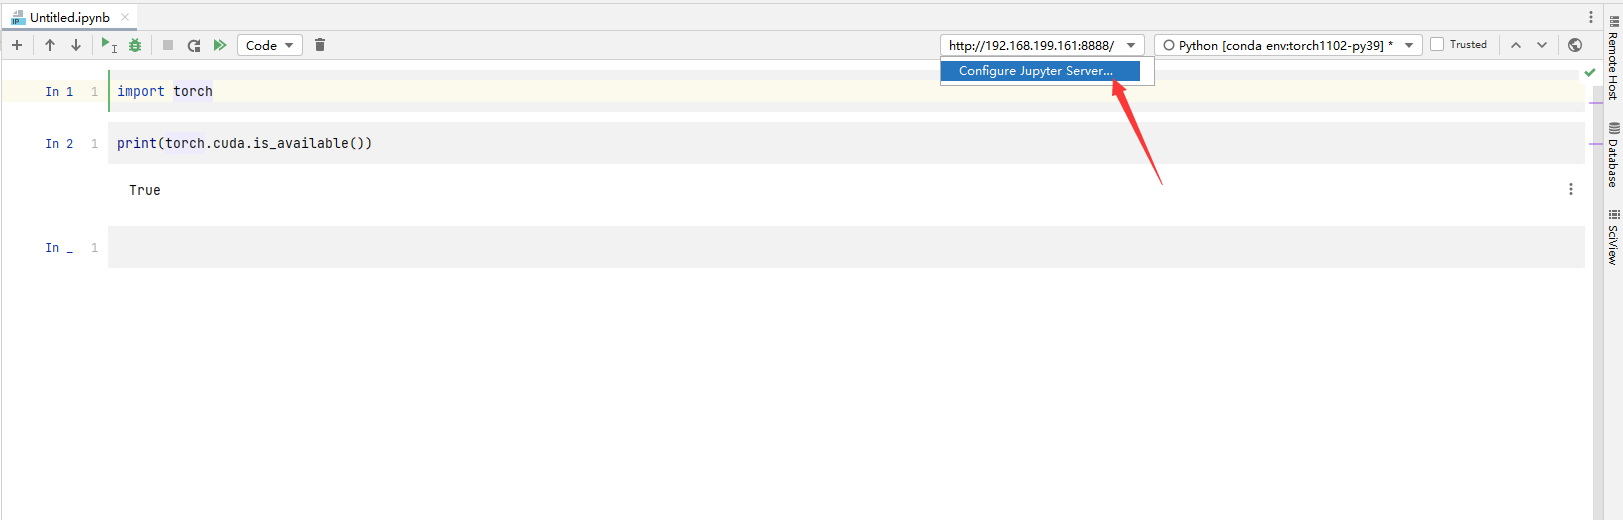 填入`http://ip:port/?token=xxx` (xxx是你的明文密码),点击Apply --- 参考: [**Pycharm+jupyter远程配置教程、及解决pycharm显示variables are unavailable集群报“No session ID specified“问题**](http://t.csdn.cn/gzjj8) [**【Pycharm】配置Jupyter Notebook远程运行**](http://t.csdn.cn/18E7o) 标签: none 本作品采用 知识共享署名-相同方式共享 4.0 国际许可协议 进行许可。